Page 4
Home Up Products Projects How To Events Photo Album Other Fabrication Our Shop Tools Our Other Toys Product Reviews For Sale Links Guest Book Contact Us

Home
Up


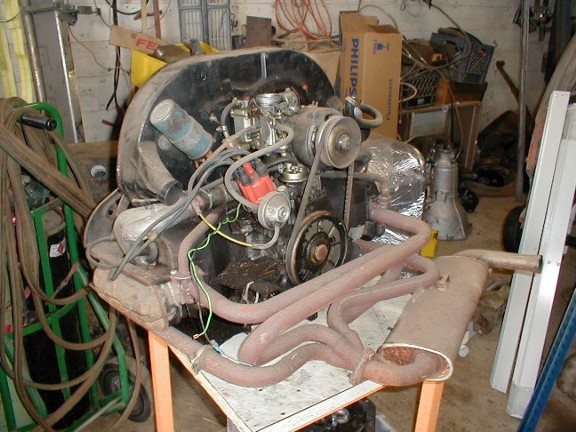
If you have any questions regarding this Project please E-mail "INSAYN".

On this car, I want HEAT!!  So with the Tri-Mill exhaust, I am not going to get it the traditional way using the stock heat exchangers. Instead, I will be fashioning up an external oil cooler that I can draw heat from.  Update 01/05/04 - Not going to happen! 

wizmotororiginal.JPG (90457 bytes) 
But, in the mean time, I was able to get back the stock dog house style fan shroud from Mark that used to be on my old motor that is going into Wiz's baja

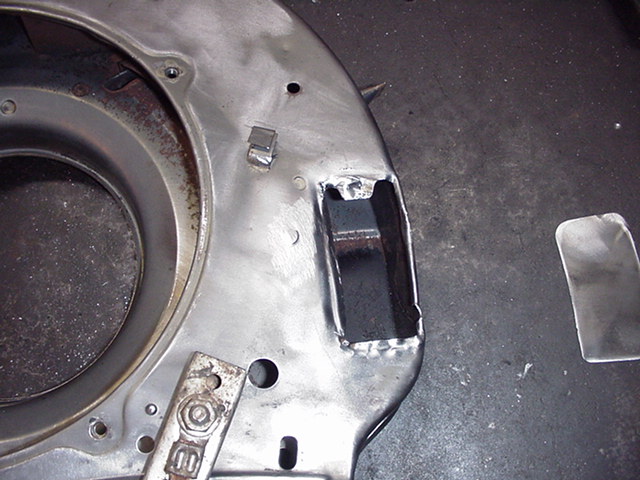
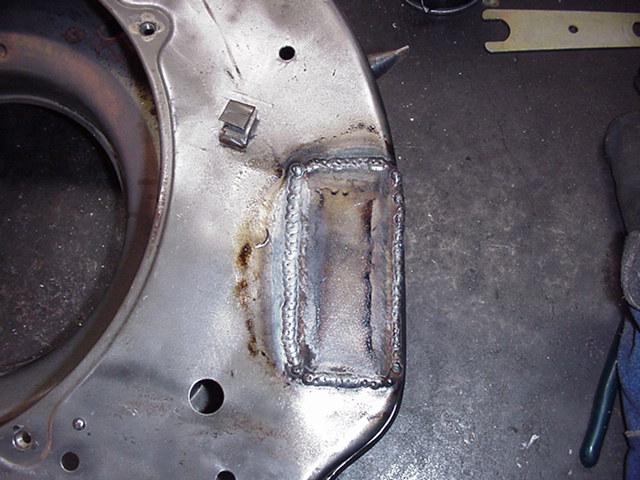
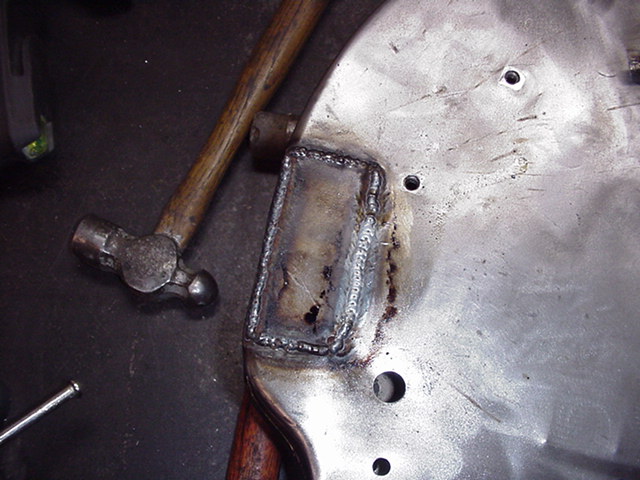
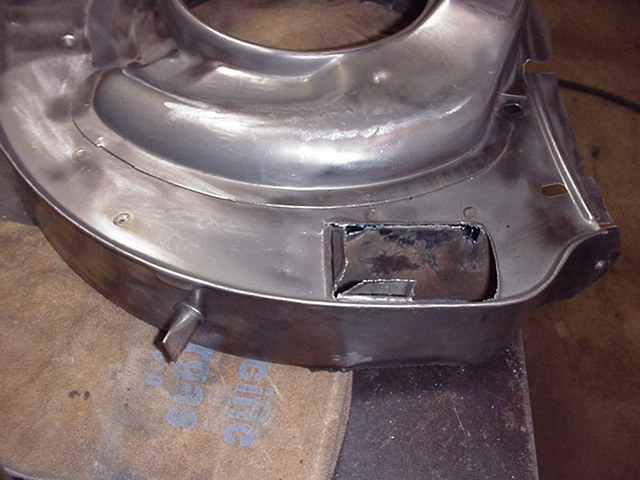
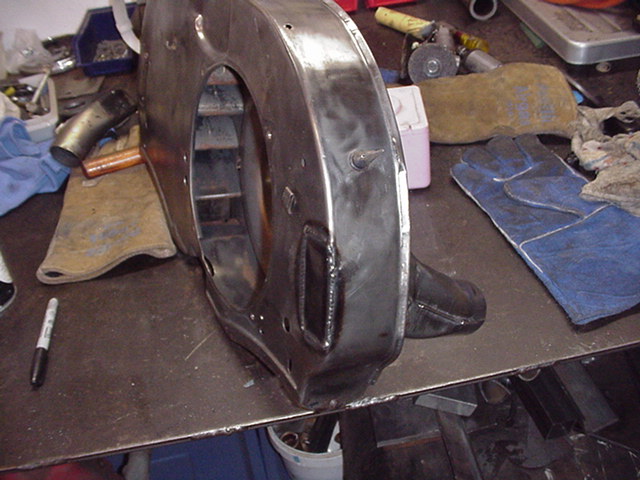
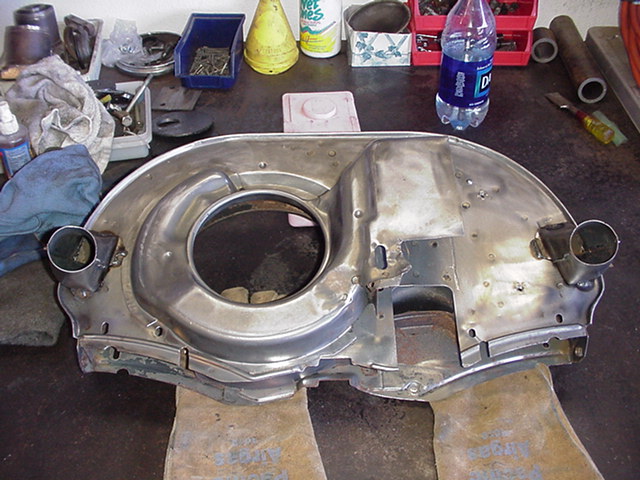
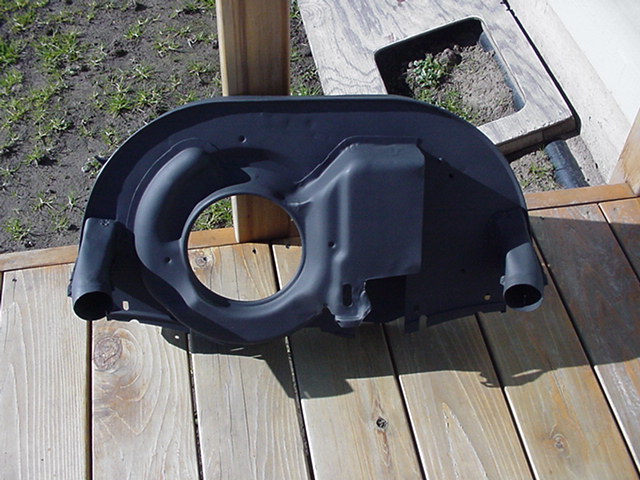
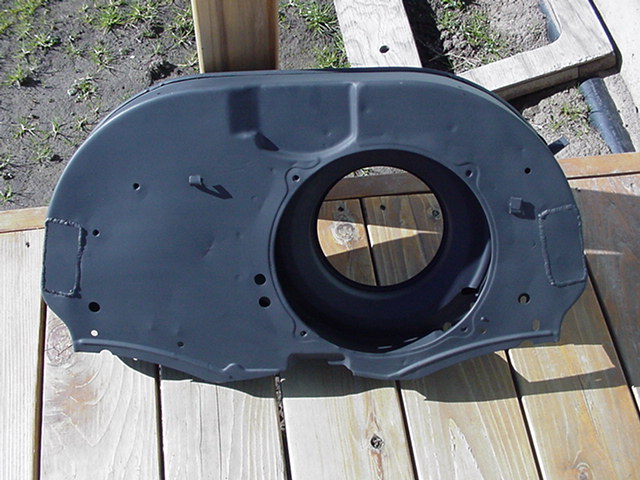
I have an idea that only trial and error will tell if it works or not.   I plan to make a box in the rear of the car, either in the package tray, or under it just above the transxle, and house an external oil cooler.  Then, route air to it via the stock shroud heater air ducts that are repositioned to make better use of space.    

How ya gunna to dat ?   

Just follow along and you will see.

First I cleaned up the shroud at the machine shop.  He has one of those high tech dishwasher type solvent cleaners.  It gets up to 160 degrees and sprays the parts in every direction.  I turned out better than I thought, it actually blasted off all the stock black paint leaving me with just a bare metal part work on.  Cool enough for me!

Ok, on to the modification.  The idea here is to relocate the stock heater ducts to back of the shroud and cap the holes in front.  

shroud01.jpg (72610 bytes)    shroud02.jpg (92936 bytes)    
Note here that I used the little hole saw, otherwise known as a spot weld cutter, to remove the 3 spot welds holding the duct to the shroud.  Also, note that the stock ducts are fluted to catch and direct the air fluently out of the shroud.  I like this design over the aftermarket chrome units from Taiwan.  Those have straight tubes welded in, and the excess air is merely pushed right past the duct and out of the shroud, rendering them less effective. 


shroud03.jpg (72231 bytes)    shroud05.jpg (83655 bytes)
Here, I hammered in the old flanges that supported the duct.


shroud04.jpg (67480 bytes)    shroud06.jpg (80957 bytes)    shroud07.jpg (88561 bytes)    shroud08.jpg (81461 bytes)
And then made some caps and welded them over the holes.  


shroud09.jpg (77676 bytes)    shroud10.jpg (83134 bytes)    shroud11.jpg (82188 bytes)    
Now I cut the back of the shroud out, directly behind the original locations, and welded them in place.  


shroud12.jpg (97568 bytes)    shroud13.jpg (90098 bytes)    
Here is what it looks like finished in the raw. Time to toss some primer on it.


shroud14.jpg (92818 bytes)    shroud15.jpg (88847 bytes)
Sitting out in the sun to dry. Next step - PAINT.  

Note : I did not spend any effort on trying to make the caps on the front  look as if they never were added, that is because it does not matter, and I did not feel that body work techniques were needed for this project. 

Note (2) : I bagged this extended project 01/05/04, as I plan to install a VW Rabbit motor that has REAL heat.  Just got to get off the couch and go do it. 


Page 5


For problems or questions regarding this web contact .
Last updated: February 27, 2014.

All content on this website belongs Blind Chicken Racing and it's employees.  All use without prior permission is expressly forbidden.  Violators will be prosecuted.